Capturing an automatic transcript of an online meeting can benefit people with hearing and auditory processing impairments, those who are neurodivergent, as well as non-disabled people who missed the meeting. It also reduces the cognitive load on the person taking notes in the meeting.
Note: automatic captioning/transcription is not a substitute for live transcription, but it is better than no transcription.
If you configure your Zoom meeting settings appropriately, Zoom can automatically send a meeting transcript to Zoom Cloud. It’ll be available within 24 hours and remain in Zoom’s cloud storage for 150 days.
University Resource:
Zoom tutorials:
Configure Zoom
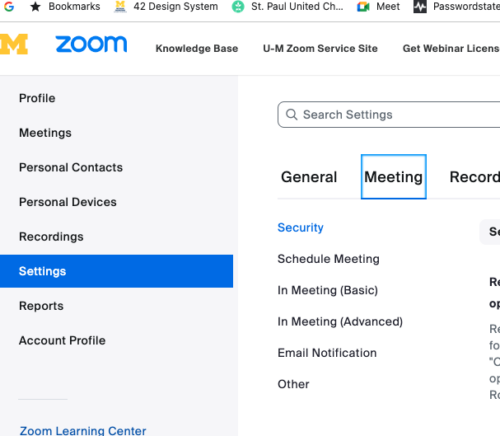
Log into Zoom’s web interface
From your dashboard, select “Settings” (left column) and “Meeting” (horizontal bar that begins with “General”)
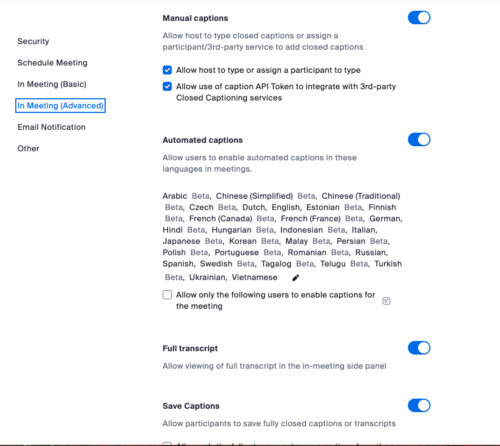
In the submenu under “Meeting” select “In Meeting (Advanced)” and enable:
- Manual captions
- Save captions
- Automated captions
- Full transcript
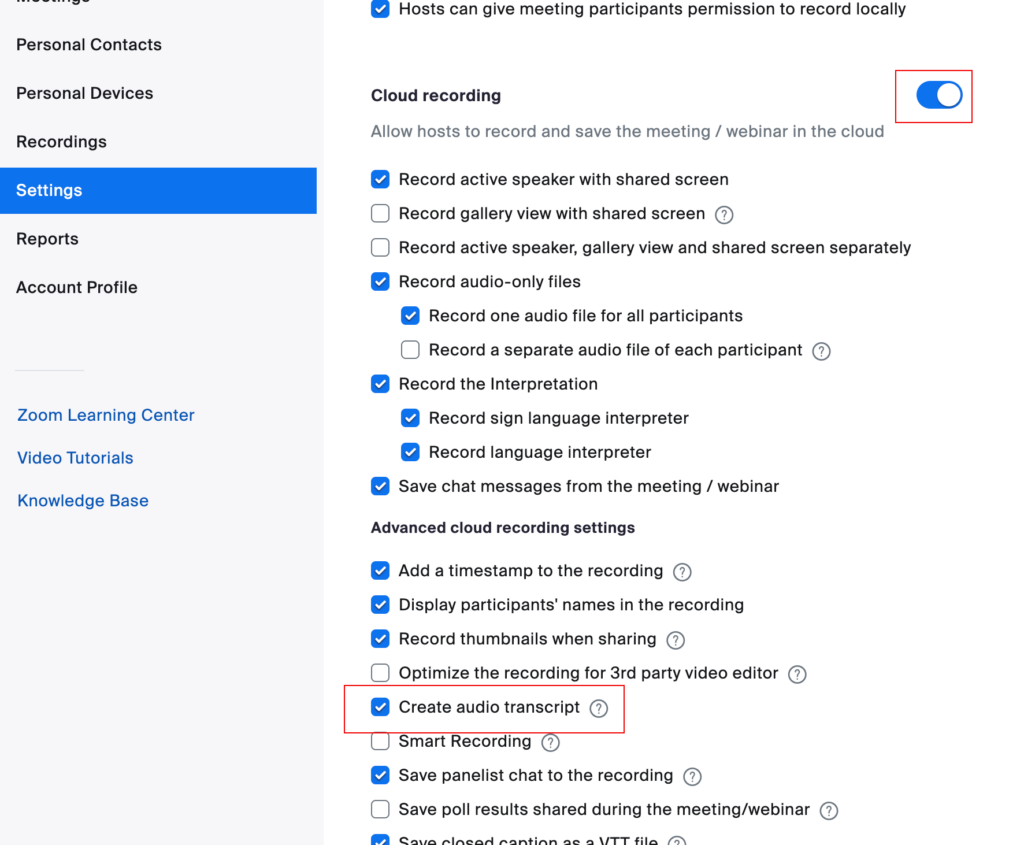
Scroll back to the top of the page and select “Recording” from the horizontal bar that begins with “General.”
Enable Cloud Recording and make sure the box before “Create audio transcript” is checked. (You may choose other cloud recording options, but this is the one that will create your transcript.)
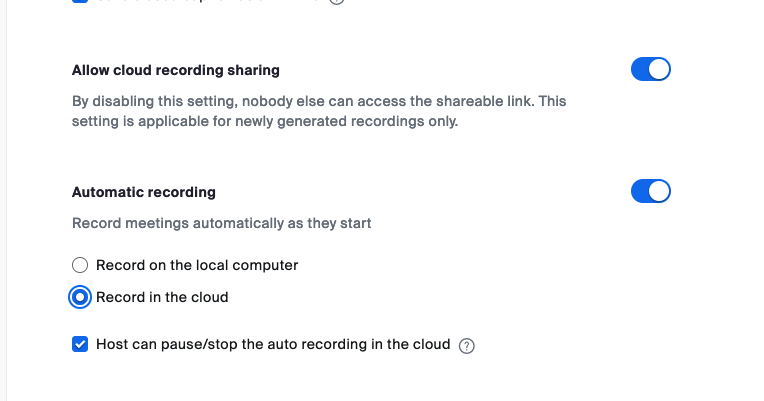
Scroll down to “Automatic Recording” and make sure “Cloud Recording” is checked as your automatic option.
Retrieve your transcript
Processing time for cloud recordings is typically about double the time of the actual meeting, but it can sometimes take up to 24 hours. To check on/manage your recording:
Zoom tutorial: Managing and sharing cloud recordings
Select “Recordings” from the left column.
You’ll see “Cloud Recordings” and “Local Recordings” listed horizontally near the top of the page. Select “Cloud Recordings” if it’s not already selected.
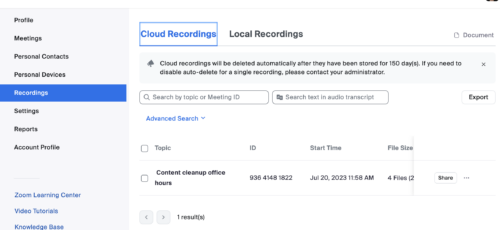
Click on the recording of your choice to see the available files.
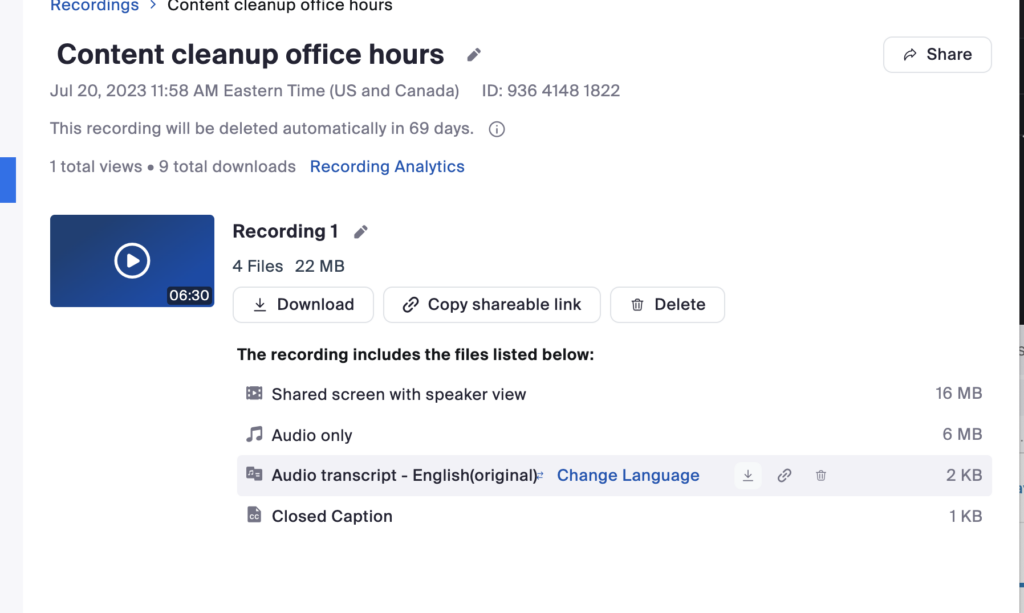
Select the file(s) you need, download and share as needed.